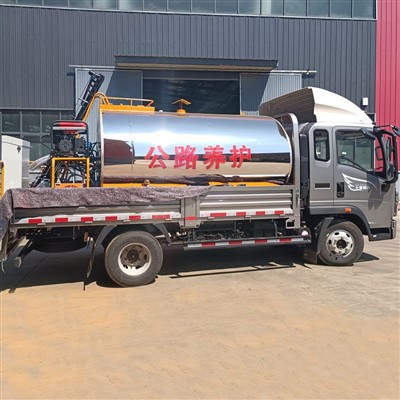
Heating pipes play a crucial role in an asphalt rubber plant. They are responsible for maintaining the proper temperature of the asphalt rubber, ensuring its fluidity and workability during the production process. When these heating pipes malfunction, it can disrupt the entire operation of the plant, leading to production delays and potential losses. As a reliable supplier of Asphalt Rubber Blending Plant, Rubber Modified Asphalt Equipment, and Rubber Asphalt Production Equipment, I understand the importance of keeping the heating pipes in top - notch condition. In this blog, I will share some practical steps on how to repair the heating pipes in an asphalt rubber plant.


Step 1: Inspection and Diagnosis
The first step in repairing heating pipes is to conduct a thorough inspection. This involves visually examining the pipes for any signs of damage, such as leaks, cracks, or corrosion. Start by shutting down the heating system and allowing the pipes to cool down to a safe temperature. Wear appropriate personal protective equipment (PPE), including gloves and safety glasses, during the inspection.
Use a flashlight to check hard - to - reach areas of the pipes. Look for any wet spots, which could indicate a leak. Cracks may be visible as fine lines on the surface of the pipe, and corrosion can appear as rust or discoloration. Additionally, check the pipe connections, valves, and fittings for any signs of looseness or damage.
Once you have identified the visible issues, it's time to diagnose the underlying problems. For example, if there is a leak, determine whether it is a minor seepage or a major rupture. A minor leak may be caused by a loose fitting or a small crack, while a major rupture could be due to excessive pressure or material fatigue.
Step 2: Gather the Necessary Tools and Materials
After diagnosing the problem, gather all the tools and materials required for the repair. The specific tools and materials will depend on the nature of the damage. For minor repairs, you may need a pipe wrench, adjustable pliers, a sealant, and replacement gaskets. If the damage is more severe and requires pipe replacement, you will also need a pipe cutter, a soldering torch (for copper pipes), or a welding machine (for steel pipes), along with the appropriate replacement pipes.
It's important to ensure that the replacement pipes are of the same material and size as the original ones. Using the wrong type of pipe can lead to compatibility issues and further problems down the line.
Step 3: Repairing Minor Leaks
If the inspection reveals a minor leak, you can often repair it without replacing the entire pipe. First, clean the area around the leak with a wire brush to remove any dirt, rust, or debris. This will ensure a good bond between the sealant and the pipe surface.
Apply a high - quality pipe sealant to the leak area. Make sure to follow the manufacturer's instructions regarding the application method and curing time. For leaks at pipe connections, you may need to tighten the fittings using a pipe wrench or adjustable pliers. If the gasket is damaged, replace it with a new one. After applying the sealant or replacing the gasket, allow sufficient time for the repair to dry and cure before restarting the heating system.
Step 4: Repairing Cracks
Cracks in heating pipes can be more challenging to repair than minor leaks. If the crack is small, you may be able to use a pipe repair clamp. These clamps are designed to fit around the pipe and apply pressure to hold the crack together. Before installing the clamp, clean the area around the crack and apply a layer of epoxy putty to fill the crack. Then, place the clamp over the crack and tighten the bolts according to the manufacturer's instructions.
For larger cracks, it may be necessary to replace the damaged section of the pipe. Use a pipe cutter to remove the cracked portion of the pipe. Make sure to cut the pipe cleanly and at a right angle. Measure the length of the removed section and cut a replacement pipe of the same length.
If the pipes are made of copper, you can use a soldering torch to join the replacement pipe to the existing pipes. Clean the ends of the pipes with sandpaper and apply flux. Heat the joint with the soldering torch and insert the solder until it fills the joint. Allow the joint to cool and then clean off any excess flux.
For steel pipes, welding may be required. This should be done by a qualified welder. The welder will prepare the pipe ends, set up the welding equipment, and create a strong weld to join the replacement pipe to the existing pipes.
Step 5: Dealing with Corrosion
Corrosion is a common problem in heating pipes, especially in older asphalt rubber plants. If the corrosion is minor, you can try to remove it using a wire brush or sandpaper. After removing the corrosion, apply a rust - inhibiting paint or coating to the pipe surface to prevent further corrosion.
If the corrosion has caused significant damage to the pipe, such as thinning of the pipe wall or holes, the affected section of the pipe may need to be replaced. As with crack repairs, cut out the corroded section and install a new pipe using the appropriate joining method.
Step 6: Testing the Repaired Pipes
Once the repairs are complete, it's essential to test the heating pipes to ensure that they are functioning properly. Start by filling the heating system with the appropriate fluid, such as hot oil or steam, depending on the type of heating system used in the asphalt rubber plant.
Check for any leaks at the repair sites and all pipe connections. Monitor the pressure and temperature of the heating system to ensure that they are within the normal operating range. If there are any abnormal readings or signs of problems, shut down the system immediately and re - inspect the repairs.
Step 7: Preventive Maintenance
To avoid future problems with the heating pipes, it's important to implement a preventive maintenance program. This includes regular inspections of the pipes, checking for signs of wear and tear, and performing routine maintenance tasks such as cleaning and lubricating the valves and fittings.
Monitor the quality of the heating fluid. Contaminated or degraded fluid can cause corrosion and other problems in the pipes. Replace the fluid at regular intervals according to the manufacturer's recommendations.
In addition, maintain proper operating conditions in the asphalt rubber plant. Avoid over - pressurizing the heating system, as this can put excessive stress on the pipes and lead to damage.
Conclusion
Repairing heating pipes in an asphalt rubber plant requires a systematic approach, from inspection and diagnosis to testing and preventive maintenance. By following the steps outlined in this blog, you can effectively repair the heating pipes and keep your asphalt rubber plant running smoothly.
As a leading supplier of Asphalt Rubber Blending Plant, Rubber Modified Asphalt Equipment, and Rubber Asphalt Production Equipment, we are committed to providing high - quality products and professional technical support. If you have any questions about heating pipe repair or need to purchase related equipment, please feel free to contact us for further discussion and negotiation. We look forward to working with you to ensure the efficient operation of your asphalt rubber plant.
References
- "Piping Handbook" by Gregory F. Payne and Charles A. Zappe
- "Heating, Ventilating, and Air Conditioning: Analysis and Design" by Donald G. Stoecker and Jerald W. Jones
- Manufacturer's manuals for asphalt rubber plant equipment